Trials teach us what we are; they dig up the soil, and let us see what we are made of. ~Charles Spurgeon

Showing posts with label DIY. Show all posts

Monday, May 14, 2012

DIY Credenza...Take 3

The third one is always a charm!!

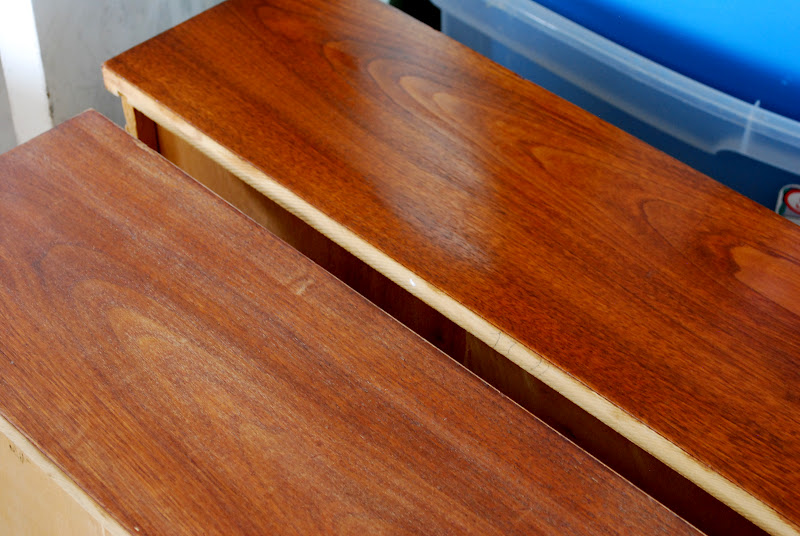
A couple weeks ago I found these two amazing Mid- Century dressers on Craig's list.  The guy had just listed them and knowing they would go really fast I called him right away.  The girls and I hitched the trailer and we left to go pick them up.  He was selling them both for $95.00.  Whoop Whoop!!  This older man just thought he was selling some old dressers...not knowing this kind of stuff goes like hot cakes!!  As I was driving there he called me to confirm I was on my way because he was getting so many calls on them.  I knew when I saw these dressers this was going to be the DIY Credenza I had long waiting for.  The set consisted of two (one long and one short) dressers.  In this picture I had already removed the legs. 
 The dressers were old and the wood was dry and dull.  The top had a laminate top but that was okay because I was going to be painting it anyway.
 Here is the smaller one with the legs.
 I lightly sanded all of the drawers and gave them a good coat of Danish Oil.  Look at the difference!  Love it!!!

 There were quite a bit of chips, nothing wood filler couldn't take care of.  You would never know now there were chips.

While I was working on the dressers my girls were busy finding treasure around the yard.  They made necklaces with the treasures. DIY necklace with rusted washer lol.


 Here is the almost finished product.  I painted the sides and top white.  You'll notice the legs are different.  As much as I liked the white legs I thought it might look better with some satin legs.  The white legs reveal that it's a mid- century piece, not that that's a bad thing, but my eyes seem to go right to the legs and that wasn't really the look I was going for.  I thought the satin legs modernized it more and now the attention was no longer on the legs


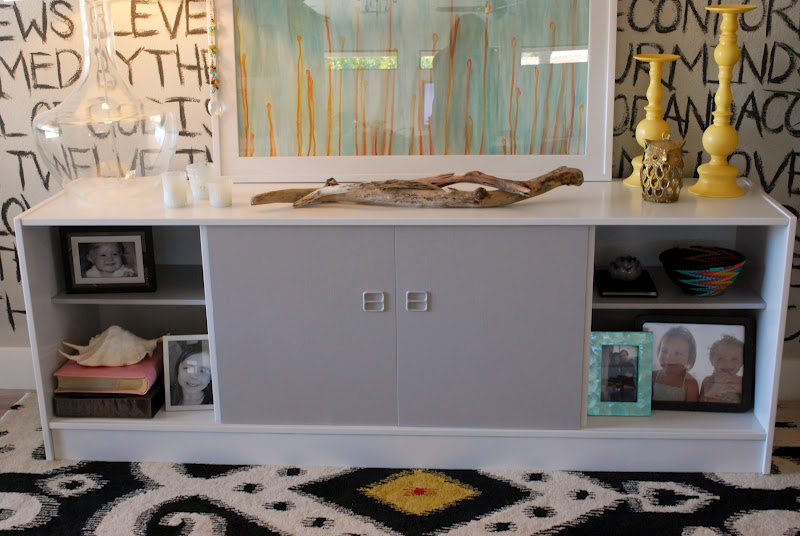
 The Finished Product...

 I love it so much!  I love how long it is, I love the color, I love that I didn't spend $3000 (that is what my dream credenza cost) and I love that I got to work on it with my own hands...makes me appreciate it all the more!!
I have been waiting and waiting for that perfect piece for this wall.  At times I was tempted to just go buy something because I never thought I would find the right length, color etc...But just like everything else, I knew if I waited long enough, eventually I would find something.  It's better than I had hoped for!  So thankful!!  Okay, I just noticed my lamp shade is crooked in these pics...gotta go fix it.


Monday, May 7, 2012

Another Wooden Stump

Of all the places to find a wooden stump, Good Will was the last place I thought I would find one!!  This sucker is huge and HEAVY.  My dad and I had to roll it into a wheel barrel out of the car and then roll it out of the wheel barrel onto the carport.  Unfortunantly there is this other stupid piece of wood that was nailed to it and when I say nailed, I mean huge, thick monster nails!!!  So the first task was to remove the two pieces of wood.
 See the hammer behind the stump.  I spent a lot of time whacking the wood with the hammer.  If there was ever a time to get some aggression out, this was the time!!  I was whacking that sucker so hard!  I had sweat pouring out my pores!
Then came the crow bar.  Ahhhhhhhhhhhhh.  I will seperate you!!!!

That little bit of separation took  F O R E V E R!!
What I was doing looked like so much fun to the girls so minus the hammer and crow bar, I let them try to separate it.  They decided...Hey if you can't seprate it, ride it!! They were having so much more fun than me. 

I finally did give up and ended up letting hubby take care of it.  Kind of funny cause he though it was going to be a breeze. 
 Unfortunately there were these weird draggon flies that were in the wood.  Some kind of indentation? What would I do without my sander!!


After sanding it I polyurethaned it with oil based poly and it really brought out the richness of the wood.  It's a seat outside for now but I have a feeling it's going to make it's way inside soon.

Friday, May 4, 2012

DIY Credenza

So I have been on this hunt for a Credenza and while I'm looking I figured I might as well get some more DIY experience.  I found this one on Craig's list for a low $.  It's not really what I was looking for but I saw a picture of a Credenza I did like and this one had a similar look so I thought I would try to transform it a bit and then resale it.  I am still so bad a taking before pics!!  I had already taken the sliding doors off but I think you can kind of get the picture?  You'll see the doors in the end.

BEFORE
 So I gave it a good sand job...which I am really starting to not like sanding!!  Then I stained it darker.  Ugh, didn't turn out the way I wish it would have.  Sorry, didn't take a pic of that either.  Note to self, don't bother staining oak...just paint it.  So after all that hard work, wanting to kick myself and take a big sledge hammer to the whole project, I walked away and started again another day.  I decided to paint it all.  I primed it and then painted the body of it white and the doors and shelves in a light grey paint that I already had.

AFTER


 It turned out quite nice.  I'm glad I did not take a sledge hammer to it lol!!  I sold it the next day on Craig's List.  In fact I had a guy commit to buying it and picking it up that following weekend due to the fact that he had to get his buddy's truck to haul it.  In the mean time I had a nutty lady who wouldn't stop texting me and emailing me, asking me to sell it to her instead.  She told me she would pay more than my asking price if I let her buy it.  Sorry lady, a commitment is a commitment...you can't put a price on integrity.

I have already found my next project or should I say next 3 projects.  My carport looks like a furniture store. 

Tuesday, May 1, 2012

A Fun Little DIY Project

Who dosent have mason jars???  And if not, run down to the local "big will"  (haha that's what my youngest calls it) and pick up a few for a buck 50.  While your out, grab some spray paint.  Spray the inside untill well coated and poof!  A cute vase.


I like how it still looks glassy on the outside. 

My silly monkey is not a fan of "big will".  She dosen't like the fact that big will takes her old toys.  "I don't want big will to take my toys."  I wonder if she thinks big will is the man who stands outside of the Good Will collecting the stuff out of your car??

Friday, October 21, 2011

More Fun

Remember these pictures I painted....

Well you know me.  I like change.  I am getting rid of the green, actually it's all going outside on the new back patio.  Anyway, I am doing a minty kind of a greenish lightish aqua.  Haha, did you get that?
So I decided to paint over these pics with a color I thought would go better...
I also added a silver glaze over the top.  I also think it plays well off of the dining table.

Wait until you see the chairs I found off of Craig's list!!  I am in the process of refinishing the wood and the cushions.  Okay, I'll give you a sneak peak...
Totally Mid-Century Modern!!  I am currently working on the one you see on the left.  It took me 2 hrs to take that chair apart!!!  And my hands were killing me!  The fabric I got is the color of my dining table top.  These chairs, once they are done, will find themselves in our family room.
  So you are not going to believe how much I found these chairs for.  I actually found another pair of these chairs here in town and the person was selling them for $225 each.  If you look them up in Ebay you'll see they are listed anywhere between $150-500...depending on the condition.  I found mine on Craig's list in Jeff City MO.  My in-law are in the process of moving here so I thought I would just have these awesome chairs hitch a ride with them.  Okay so are you ready for the price....$50 for BOTH!!!!!!!!!  Whoop Whoop!!
My In-laws are making their final move next weekend and I have been able to find two more amazing finds.  Can't wait to show you!

The other day the girls and I decided to have another painting day.  I purchased two little canvases for the girls to paint on and I myself bought a long canvas to place above my fireplace.  I wanted to do something in grey and yellow since grey is the color running through the house and yellow is my pop color. 

Sorry about the shadows but I didn't want to take it down again.  I think it will look better up there once we have the fireplace sandblasted.  It's not professional but it beats spending hundreds of $'s!!